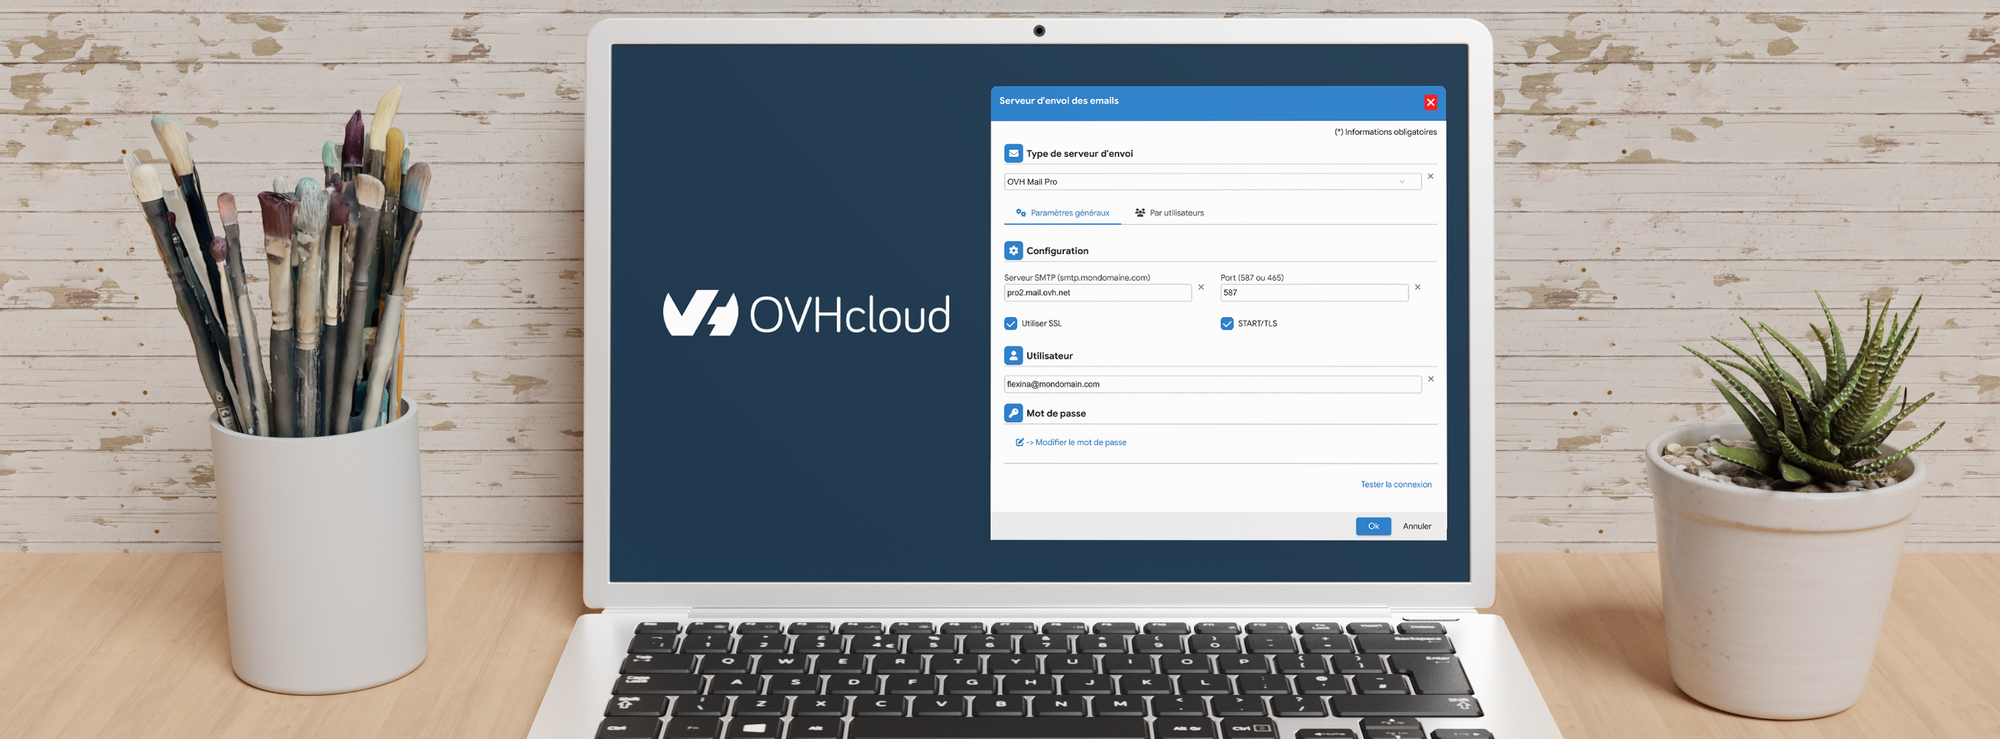
This guide accompanies you in configuring your OVH Email Pro account for sending emails via Flexina online invoicing software. For better security and traceability, we recommend creating a dedicated email address.
⚡️ For optimal management of your email sends, it's recommended to use a dedicated address rather than your main address.
1Creating a new email address
- Log in to your OVH account
- Access the "Email Pro" section
- Select your email service
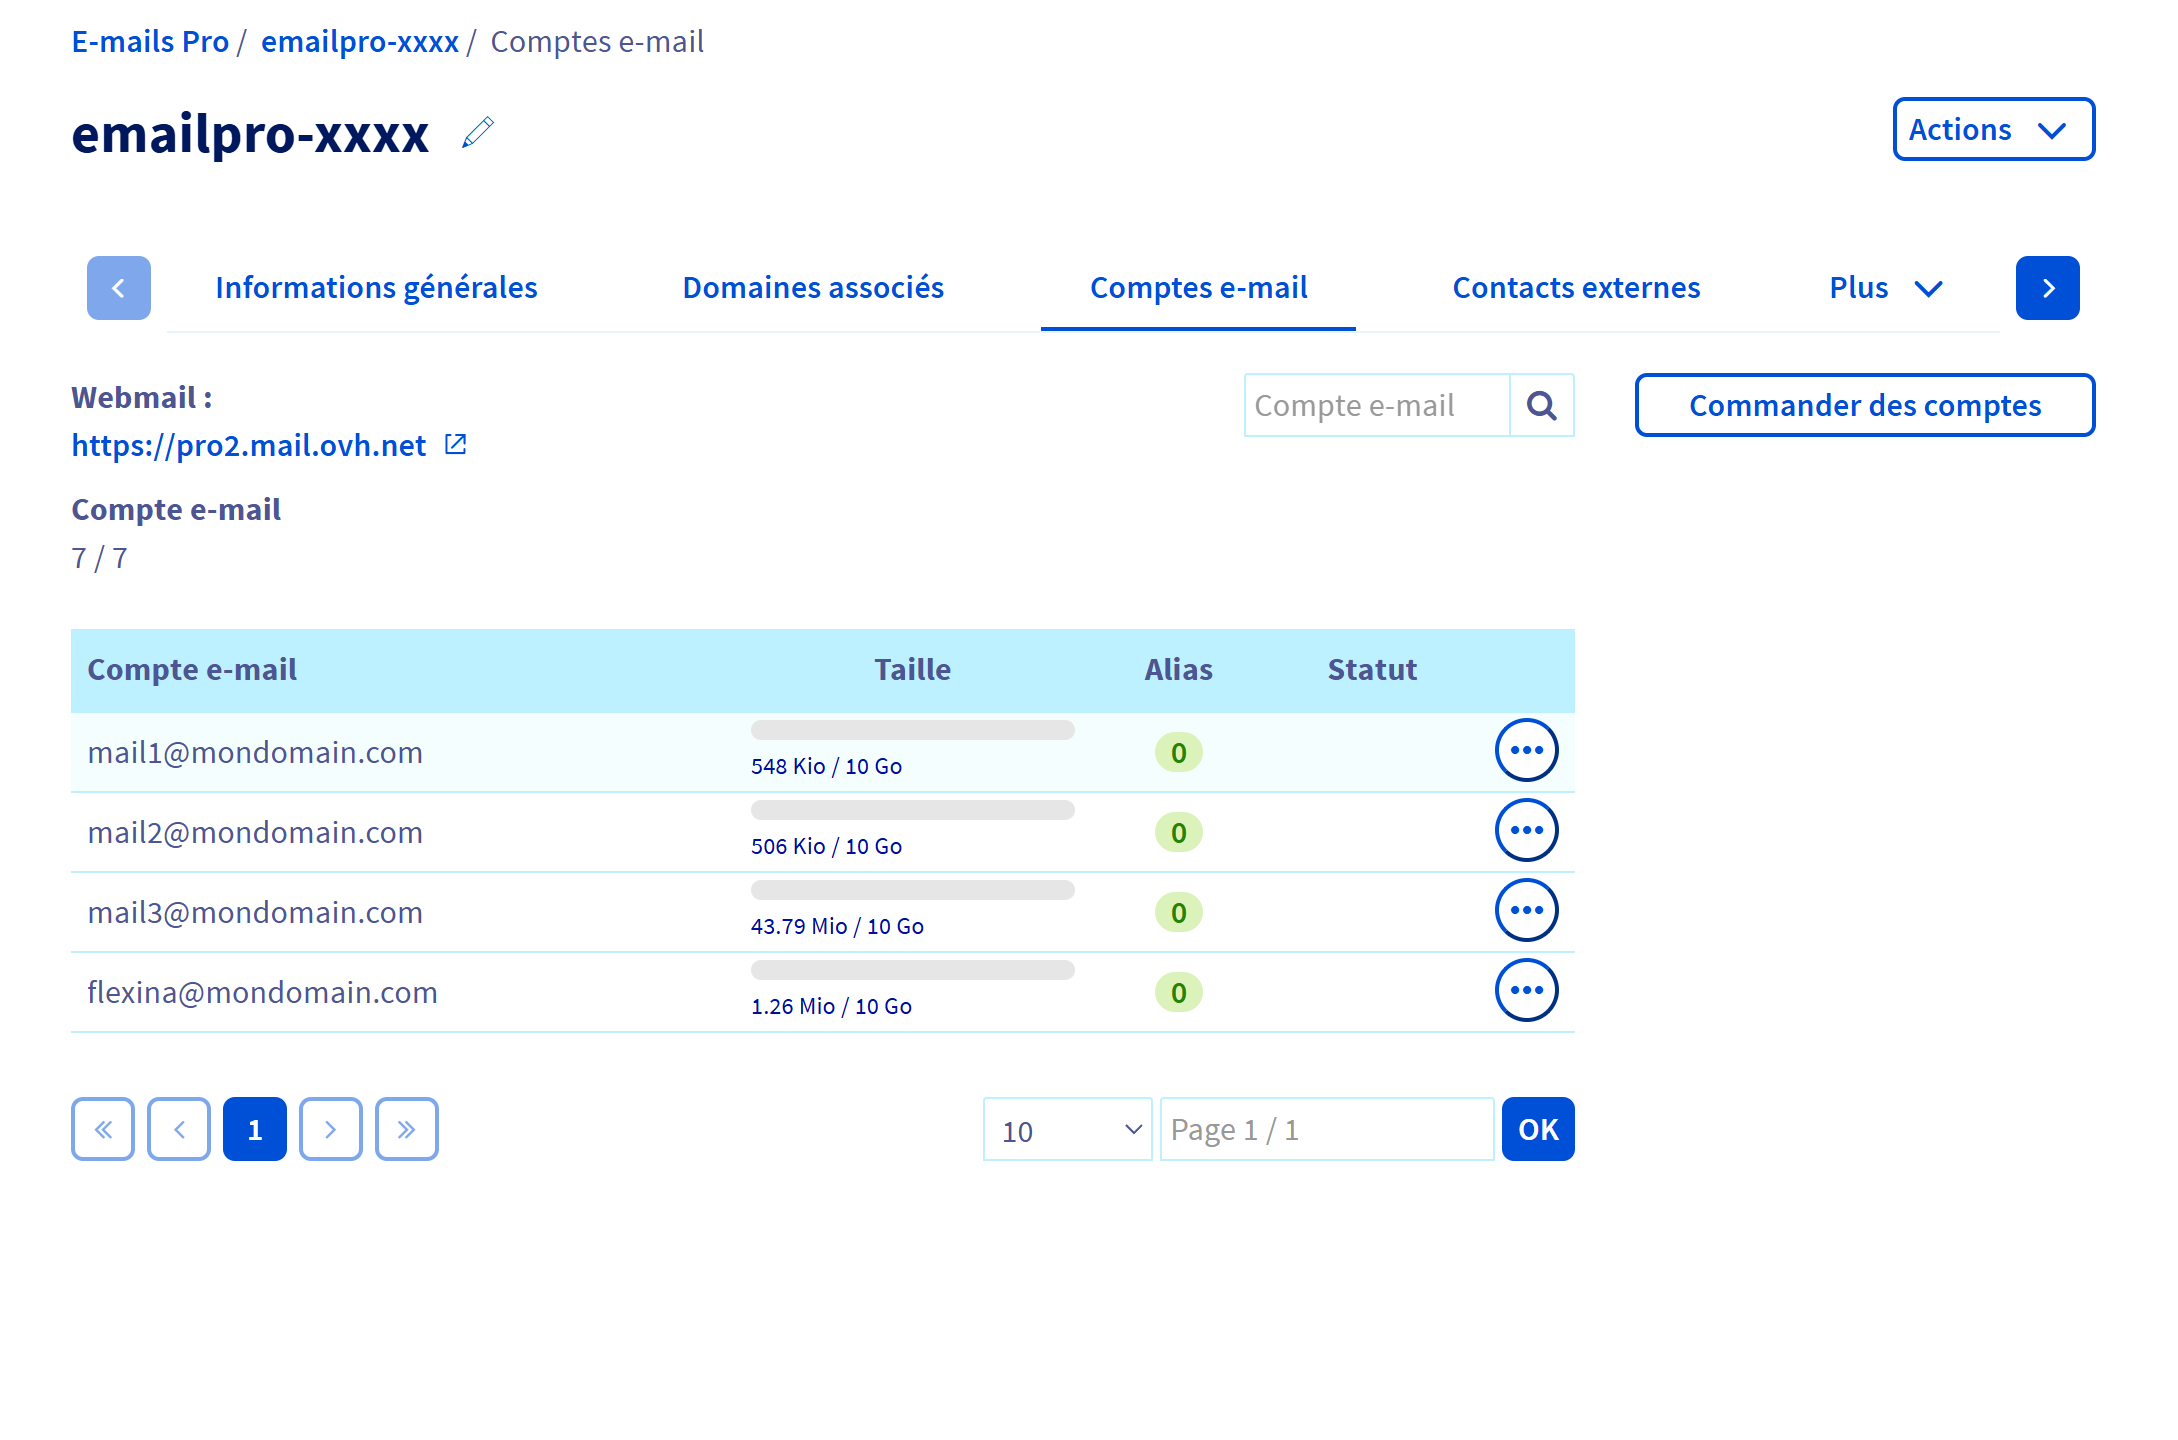
- In the "Email accounts" tab, click on "Order accounts"
- Create a specific address for Flexina
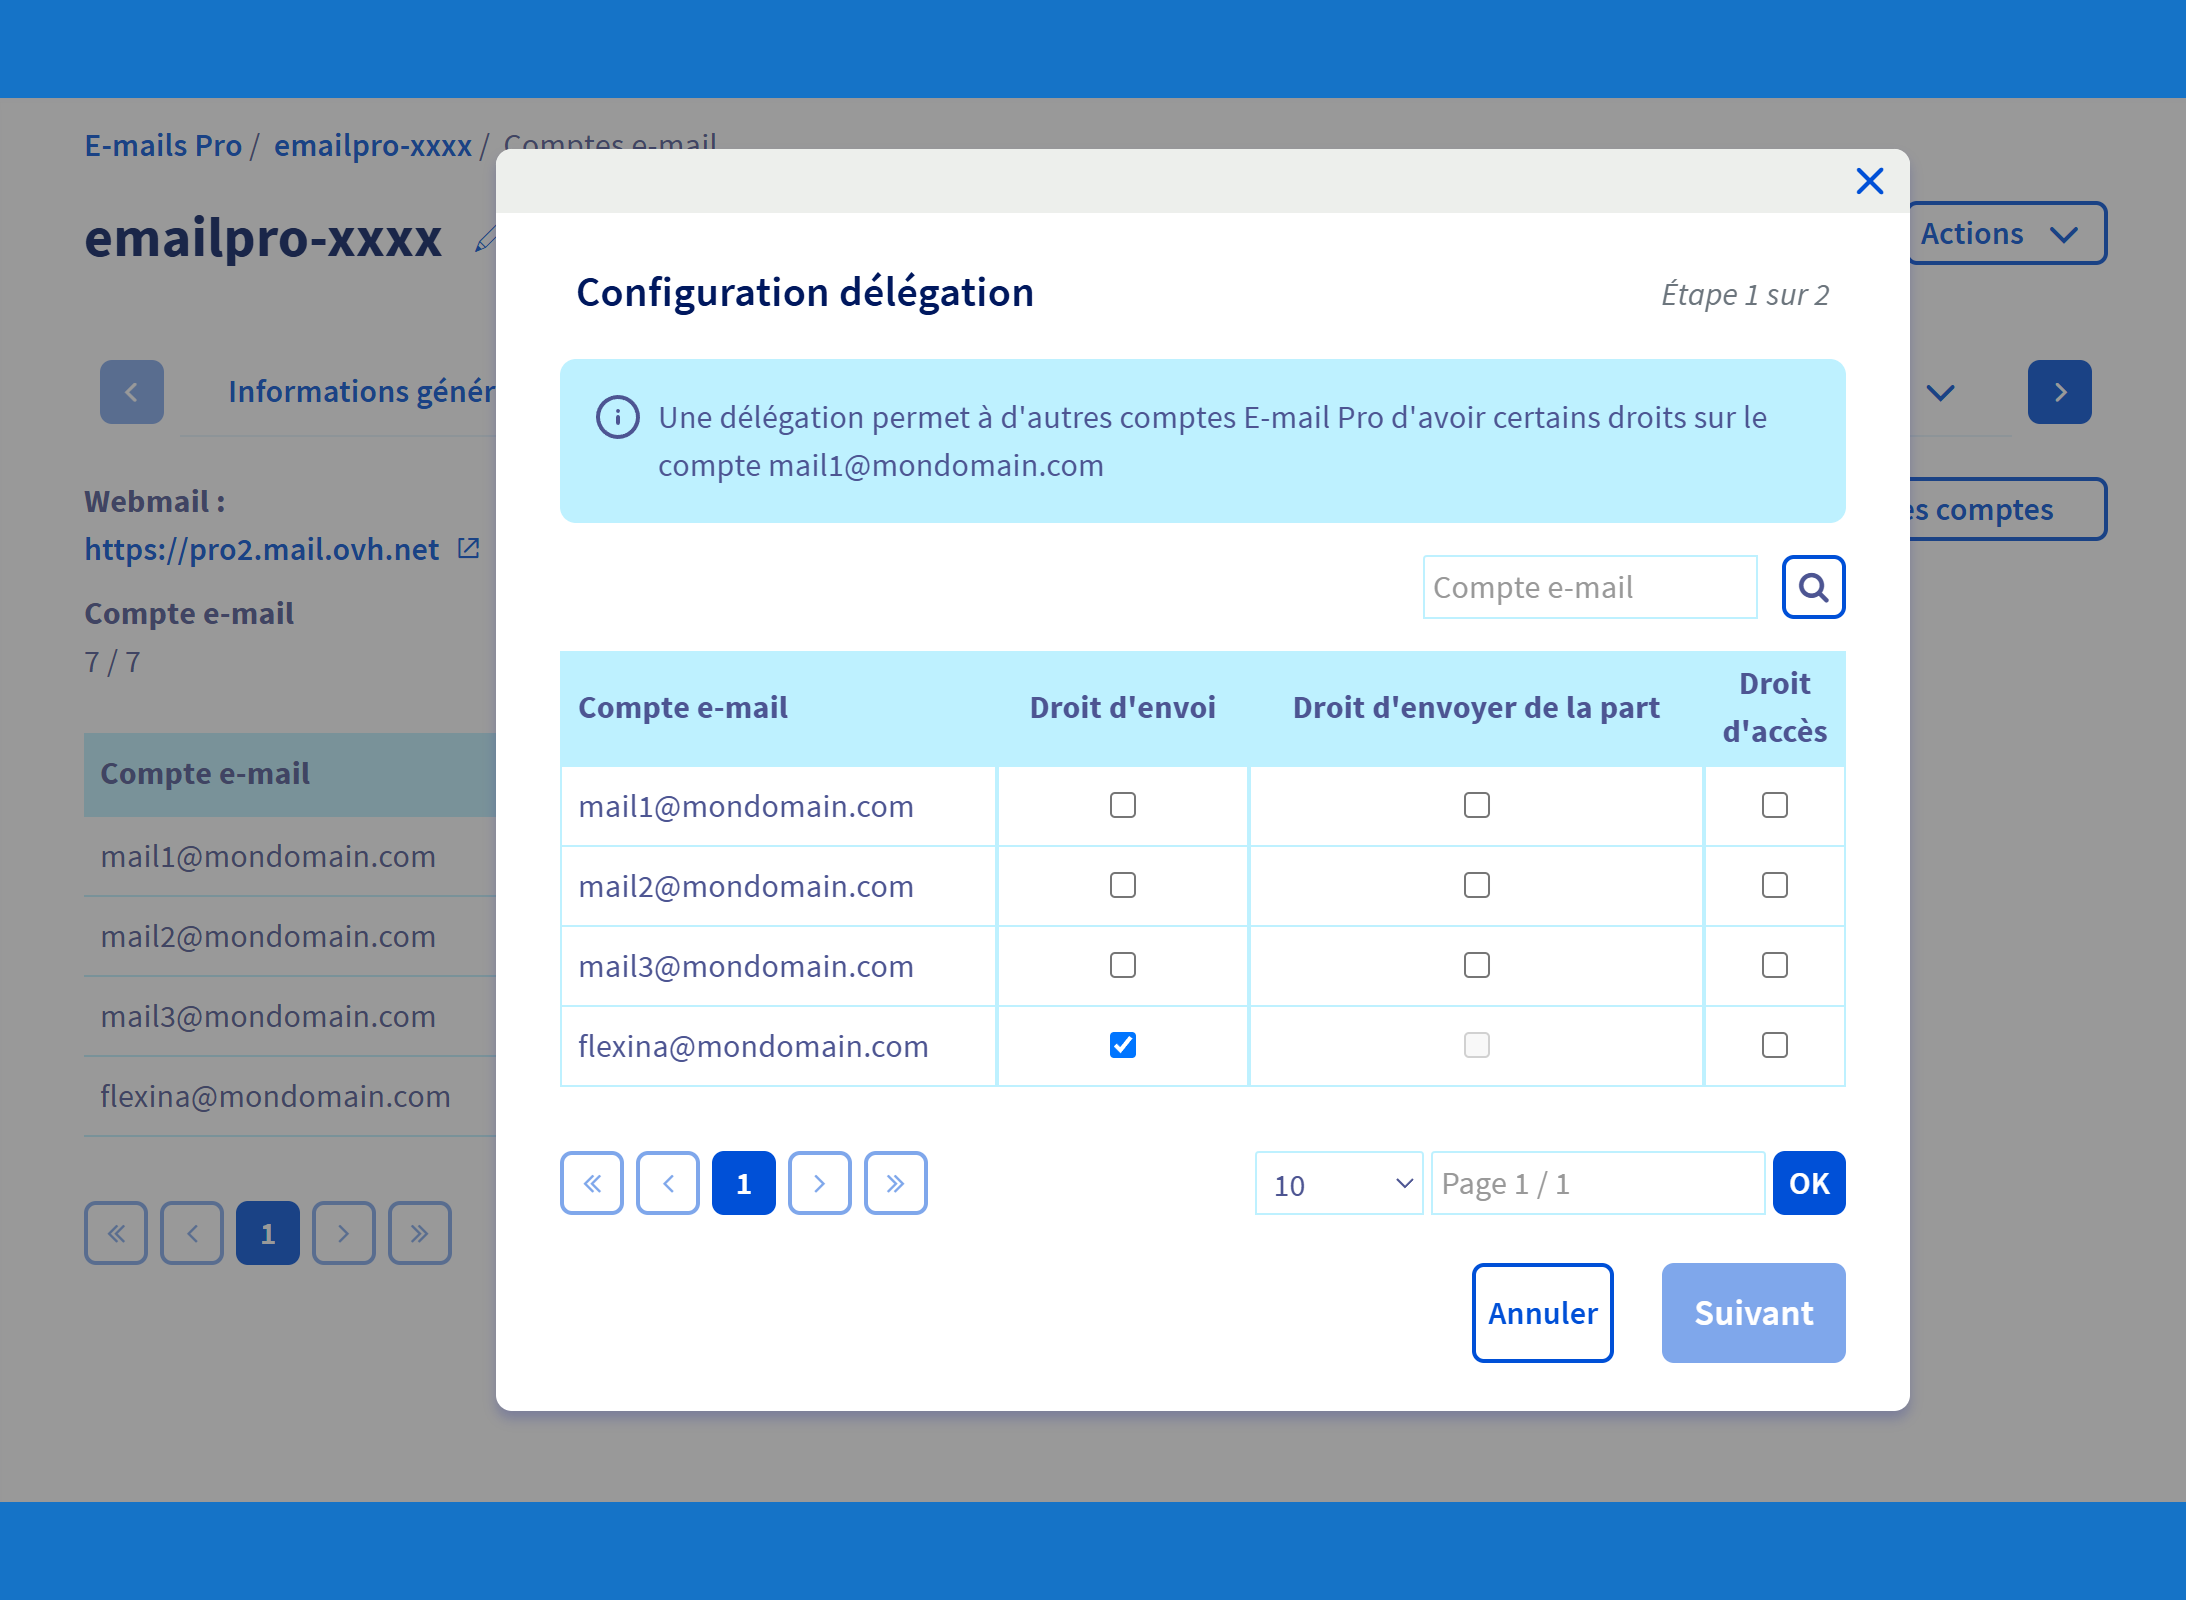
2Configure delegations
- In the accounts list, find your main address
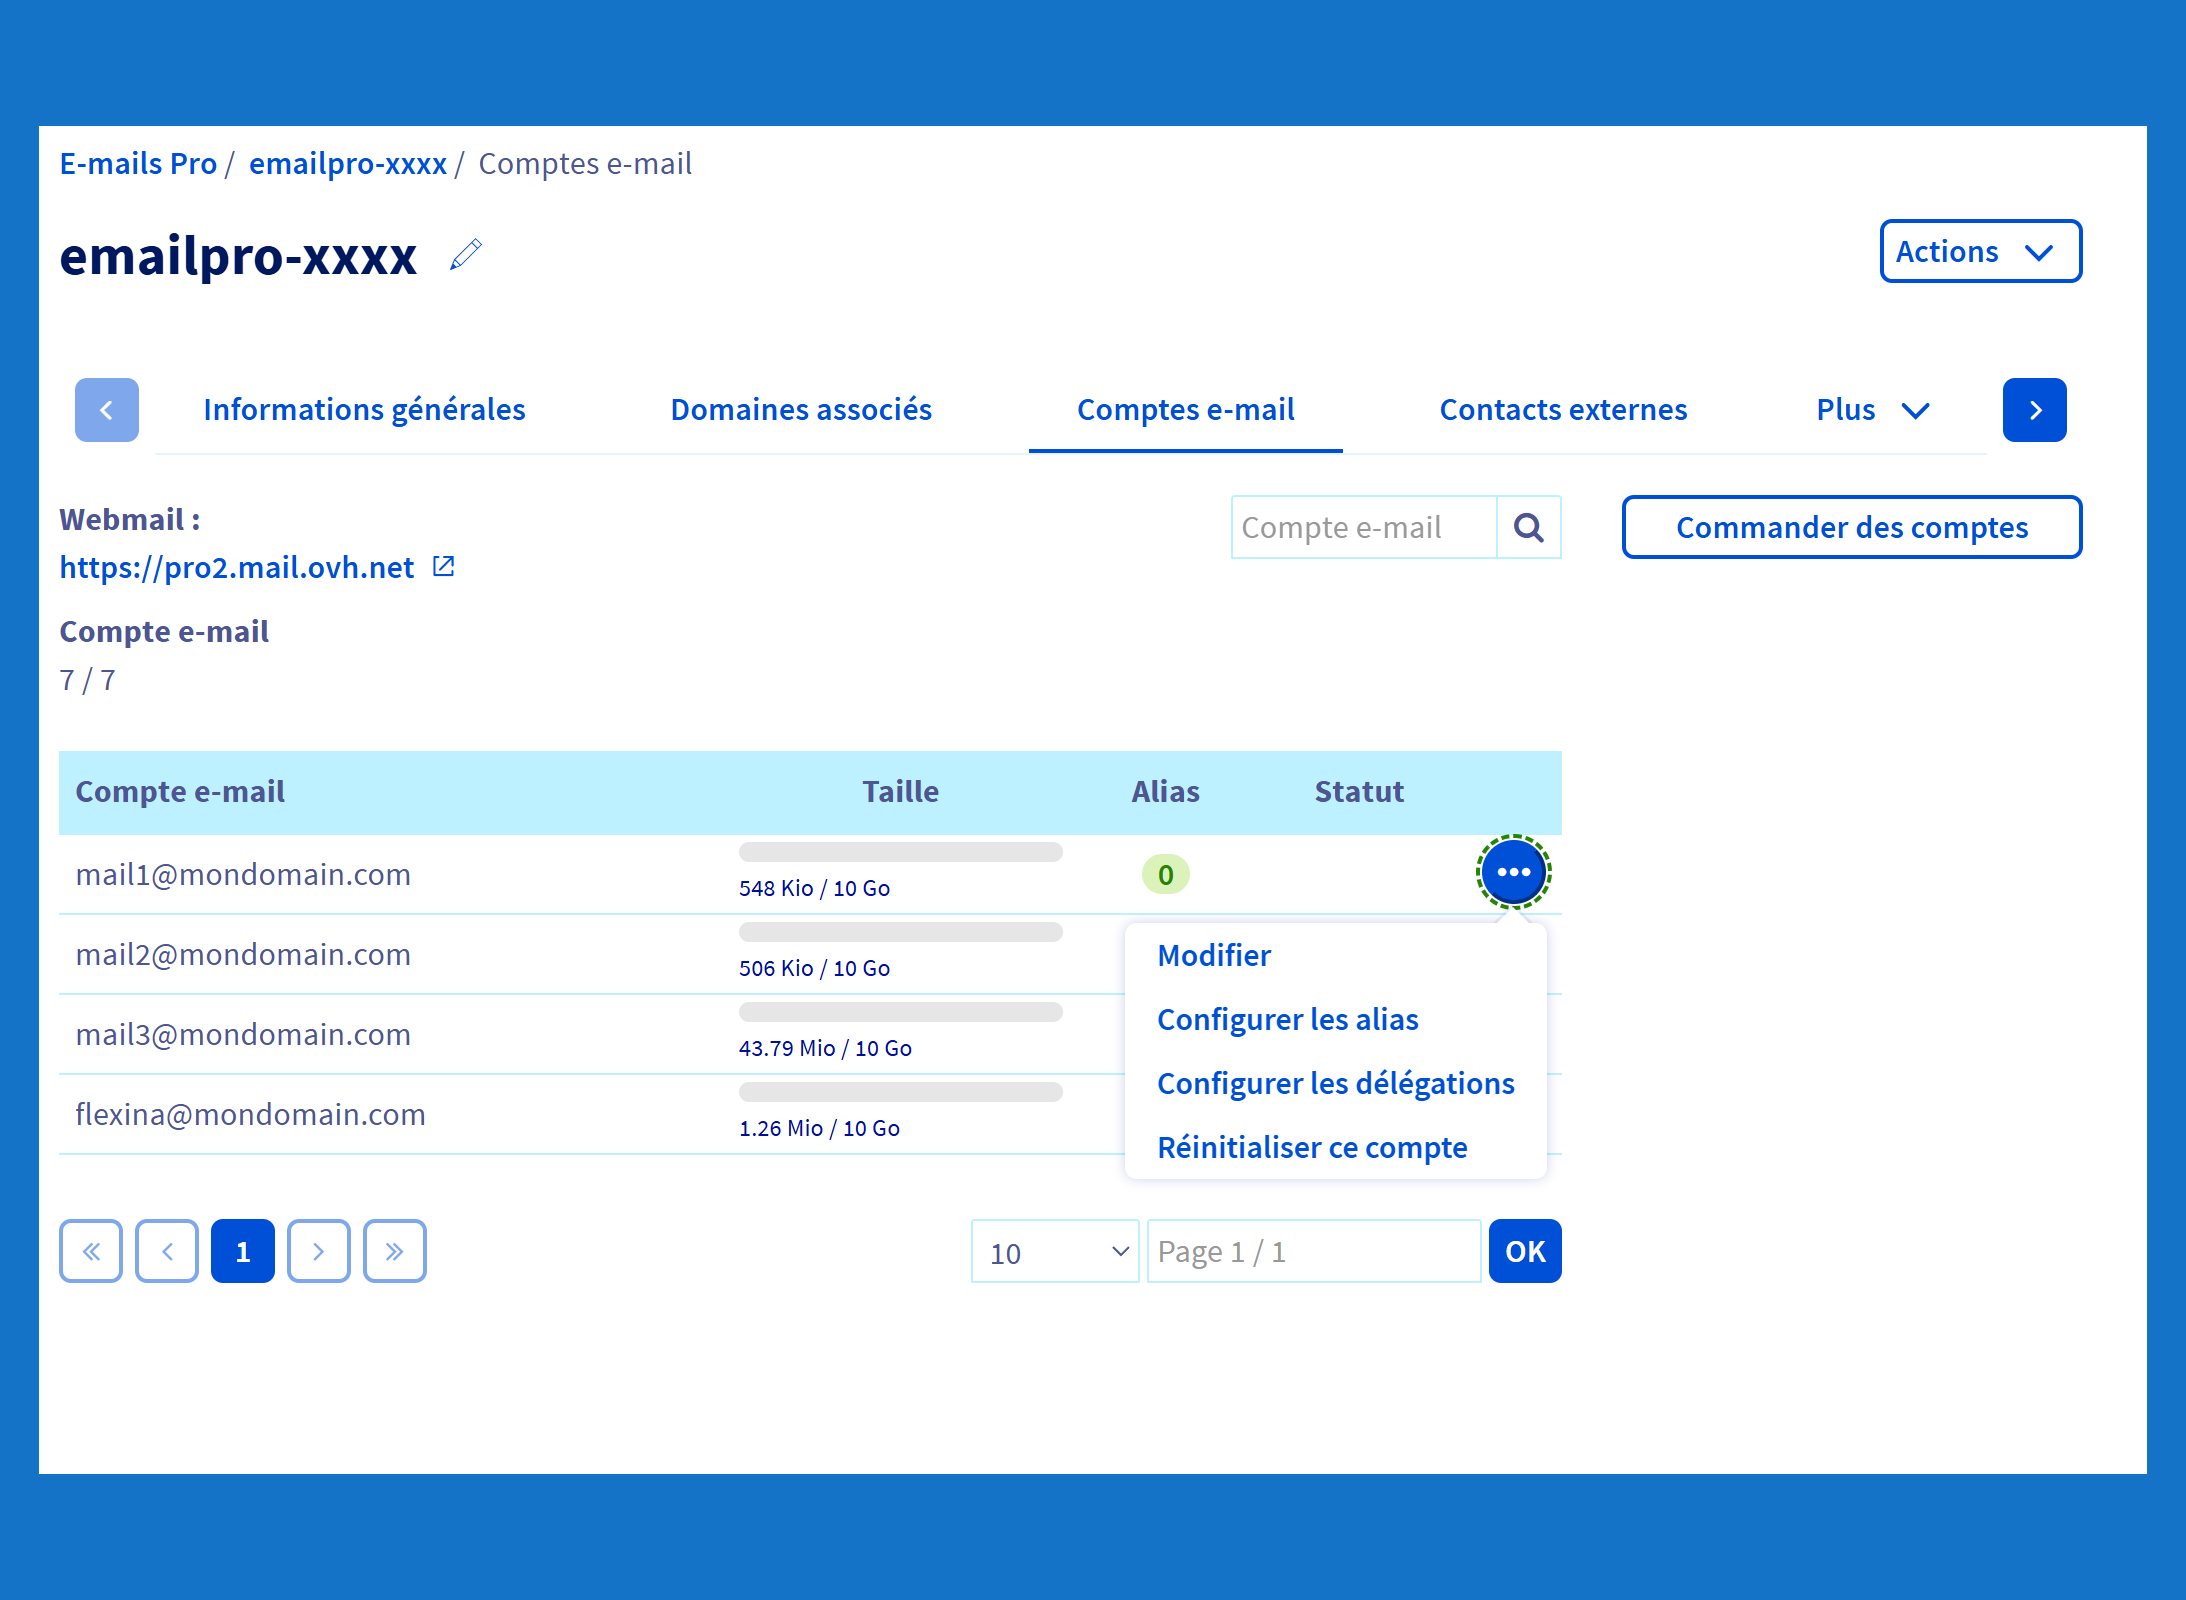
- Click on the "..." button to the right of the address
- Select "Configure delegations"
- Check "Send rights" for the Flexina address
- Validate the changes
3Configuration in Flexina
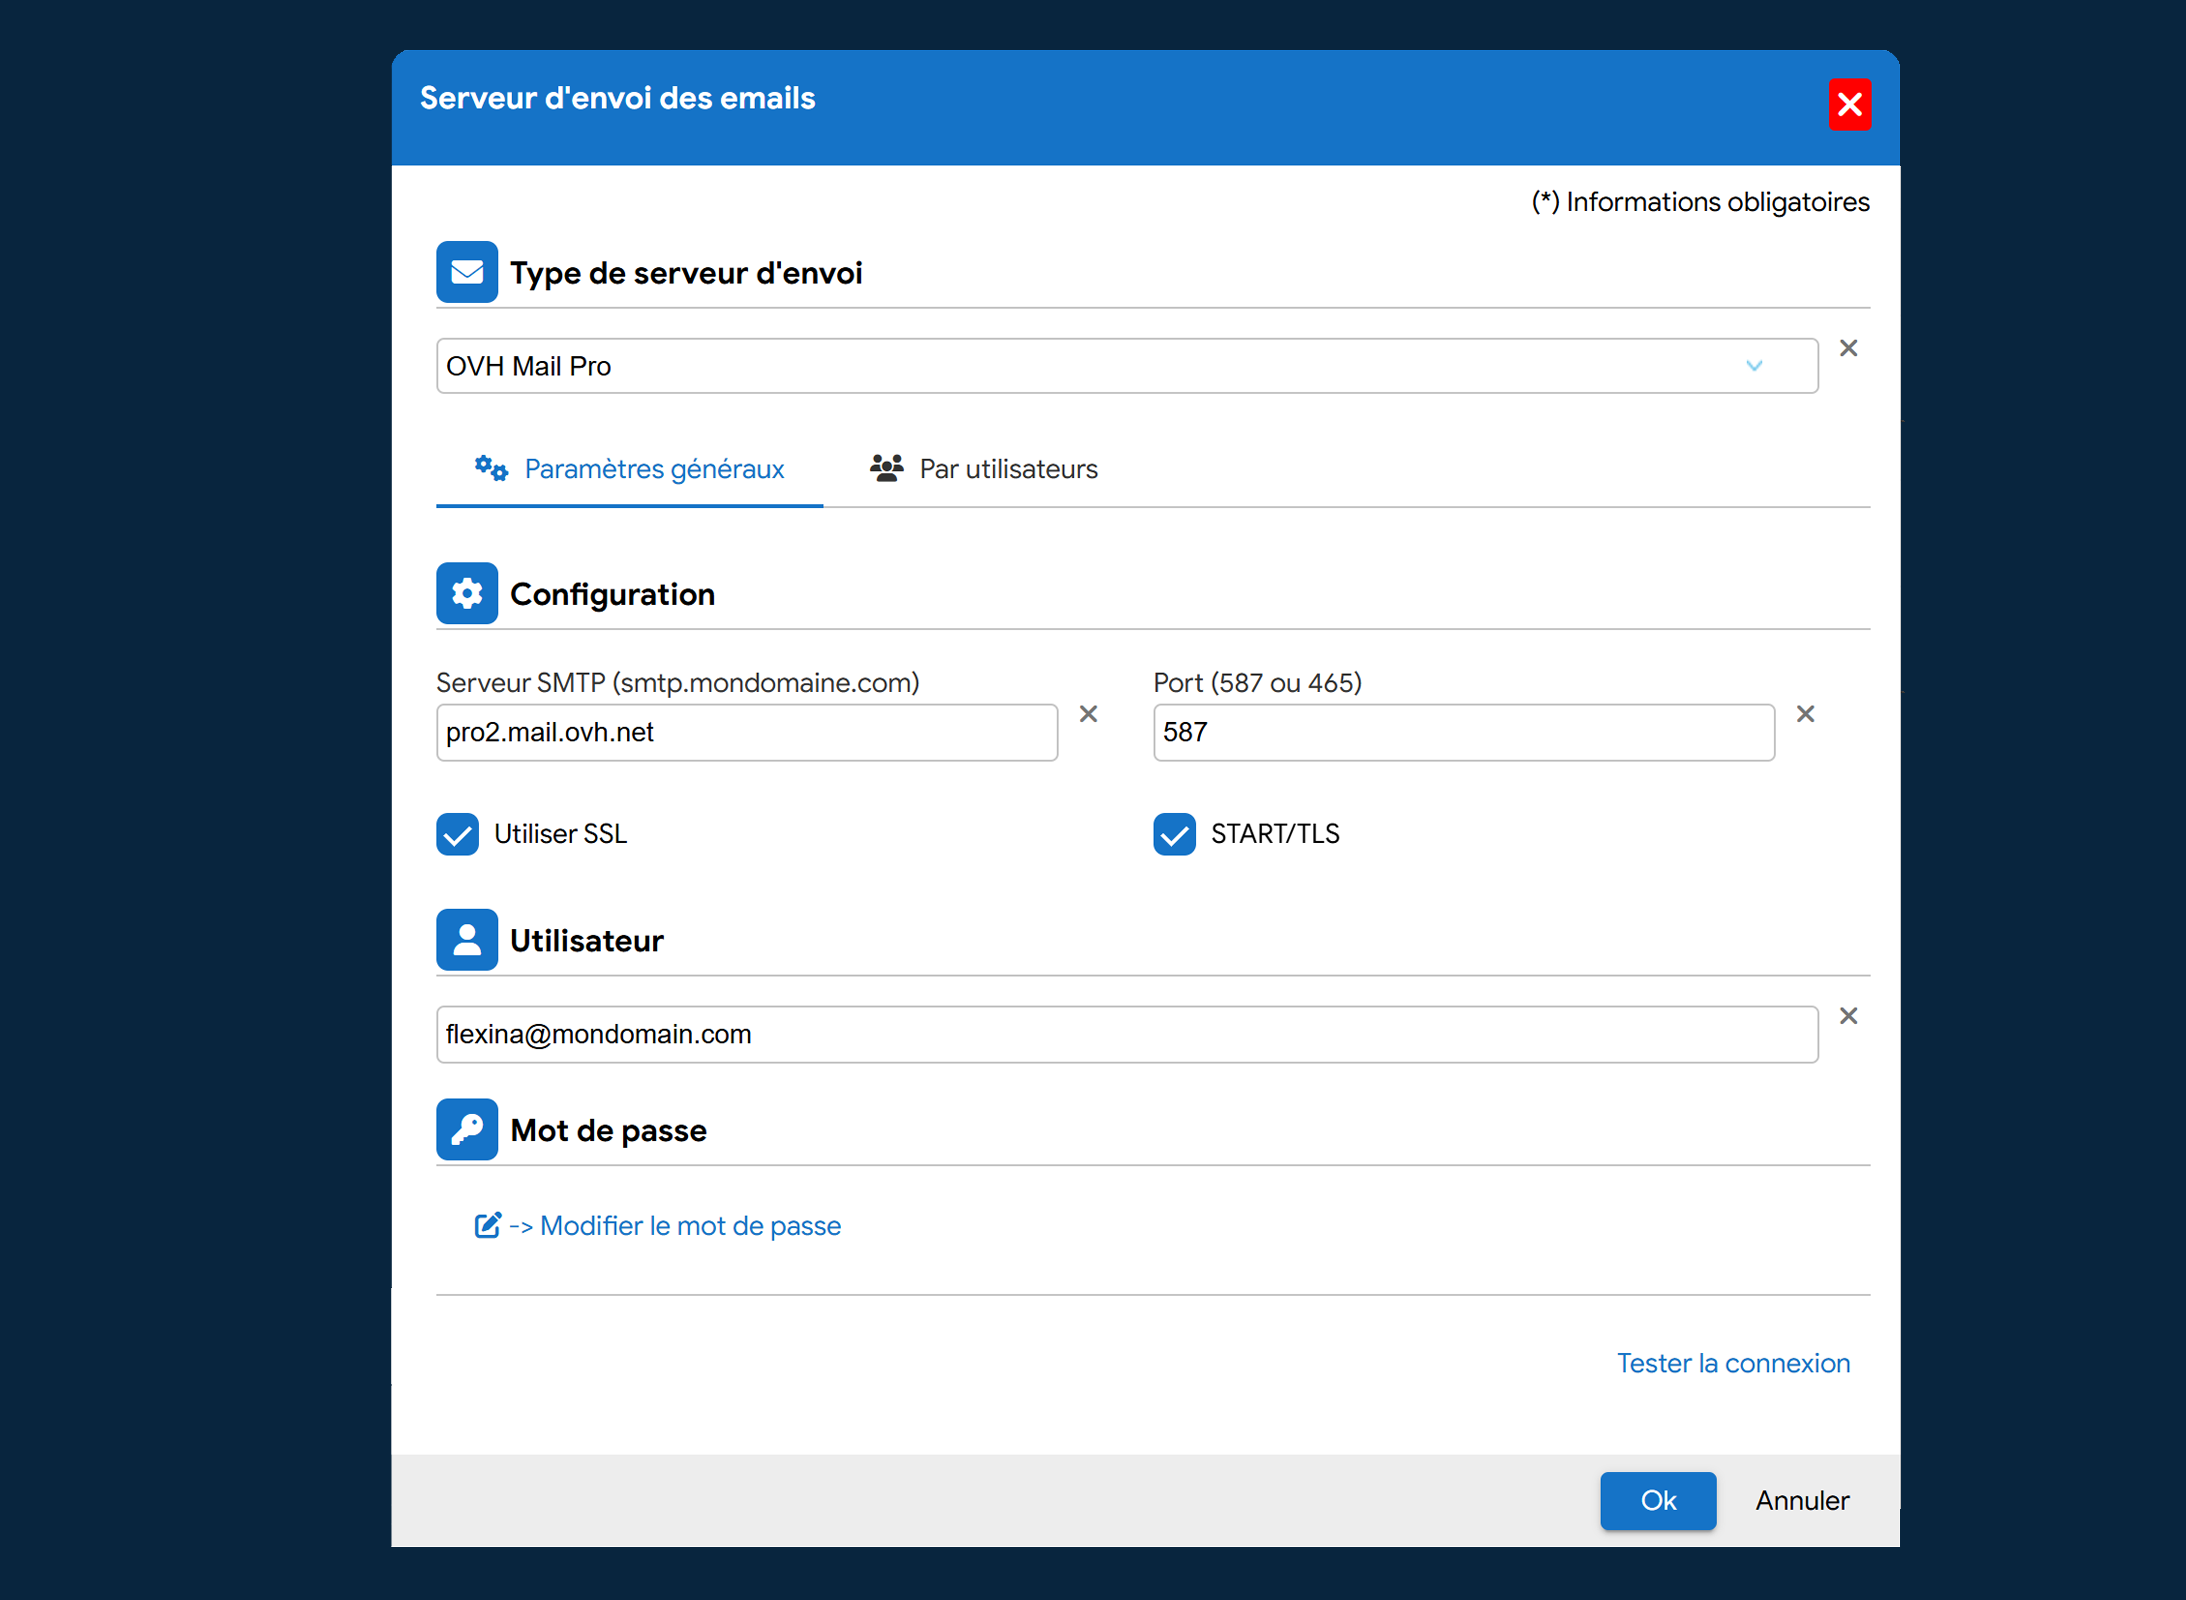
- In Flexina, access the email settings
- Select "OVH Email Pro" from the list of providers
- The settings will be automatically pre-filled
- Only verify the SMTP server which must match your OVH server
ℹ️ The server number (XX) is visible in your OVH interface under "General information". For example: pro2.mail.ovh.net, pro3.mail.ovh.net, etc.
4Verification points
- Verify that the OVH server number (proXX) matches the one in your interface
- Ensure that delegations are active
- Perform a send test from Flexina

